Below information is
provided by assuming that you are a registered iOS developer i.e., you are enrolled in Apple's iOS
Developer Program and are allowed to submit applications for publication in the
App Store.
Step 1:
For submitting your
application to the App Store, you should first prepare all the below
needs
(a)
i) an App ID or
application identifier
ii) a valid distribution
certificate
iii) a valid
provisioning profile.
(b) Your application's
Metadata :
1) Application's
name
2) The version number
3) The primary (and an
optional secondary) category
4) App description
5) Keywords
6) Copy right
7) SKU Number (Stock
keeping Unit)
8) Screen shots
9) Support email address
10) A support URL
11) Test or demo account
(if your application require users to sign in?)
12) End user liucence
agreement
13) 1024px x 1024px
icon of ur app
14) Separate screenshots
for the 3.5" and the 4" screen sizes of the iPhone/iPod Touch (can have up to five
screenshots and you must provide at least one)
Step 2:
Visit iTunes Connect and sign in with your iOS developer account, and click 'Manage Your Apps'.
Click the 'Add New App' in left and select iOS App, and fill out the Basic Information, Price and Availability and Metadata forms with all the information prepared in step 1.
Step 3:
Once your application's
metadata is submitted, your apps status will change to 'Ready to Upload Binary'.
Then you need to create an
archive of your application by configuring your target's build settings in
Xcode with the distribution
certificate and provisioning profile, and start building your application on a
physical device. ( Xcode ---> Product ---> Archive )
Now an archive and Xcode's organizer should automatically open and show you the archive you just created.
Step 4: Validating and
distributing binary
a)Select the archive
from the list and click the
Distribute button on the right.
b)From the options you
are presented with, select Submit to the iOS App Store.
c) Enter your iOS developer account credentials.
d) Select the
Application and Code Signing Identity.
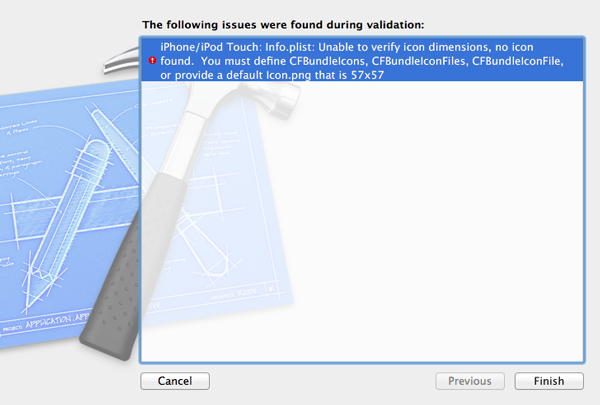
During this process,
your application will also be validated. If an error occurs
during the validation, the submission process will fail or else the application
binary is uploaded to Apple's servers.
( The validation process is very useful as it will tell you if there is something wrong with your application binary that would otherwise result in a rejection by the App Store review team)
If the submission process
went without problems, your application's status will change to
'Waiting for Review'.
It takes some days for Apple to review your application.